This article introduces how to build status bar app on Mac OS X using Cocoa with Swift. The source code can be downloaded here.
Development environment:
- OS X: 10.11.4
- XCode: 7.3
- Swift: 2.2
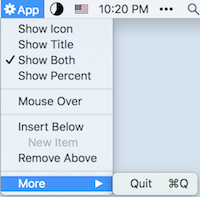
After it’s finished, the app looks like:
How to Run as Status Bar App?
In another word, how to make the application not show a dock icon? The key point is to modify the application’s Info.plist file and indicate that it’s an agent. “Agent” is Apple’s term for a background application that doesn’t present a dock icon.
Select the project at the top of the project navigator. Open the Info tab at the top of the main editor. Add a new entry of Application is agent (UIElement) and set the value of this entry to YES.
How to Let Status App Start?
It’s better don’t write much code in AppDelegate or other single class. To do it, I split main code in these 2 controllers:
StatusItemController
This controller is mainly to ‘start’ the app, i.e., init the status bar item. And also set the menu for status bar item.StatusMenuController
This controller mainly works as the delegate of status bar item’s menu. E.g., implement the actions of menu items.
Then, how to let the app start? Steps:
- Open ‘MainMenu.xib’.
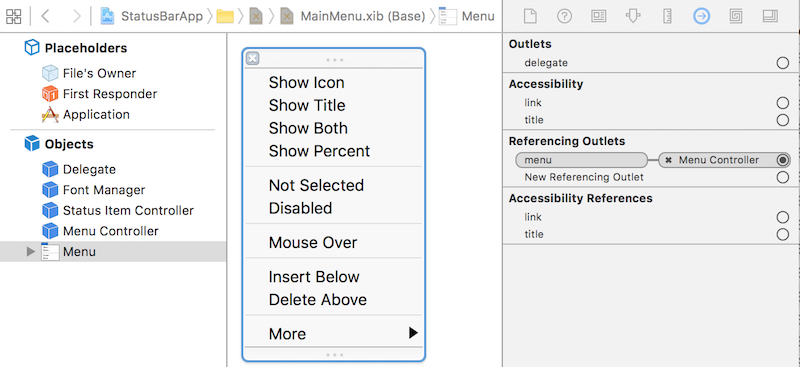
- Create Menu and sub-menus.
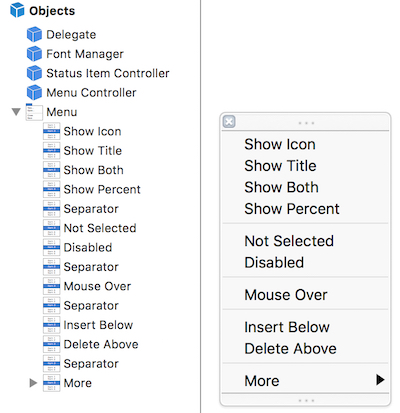
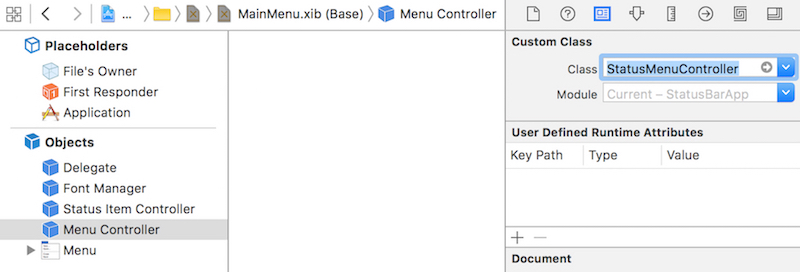
- Add an Object. Set its class to ‘StatusMenuController’.

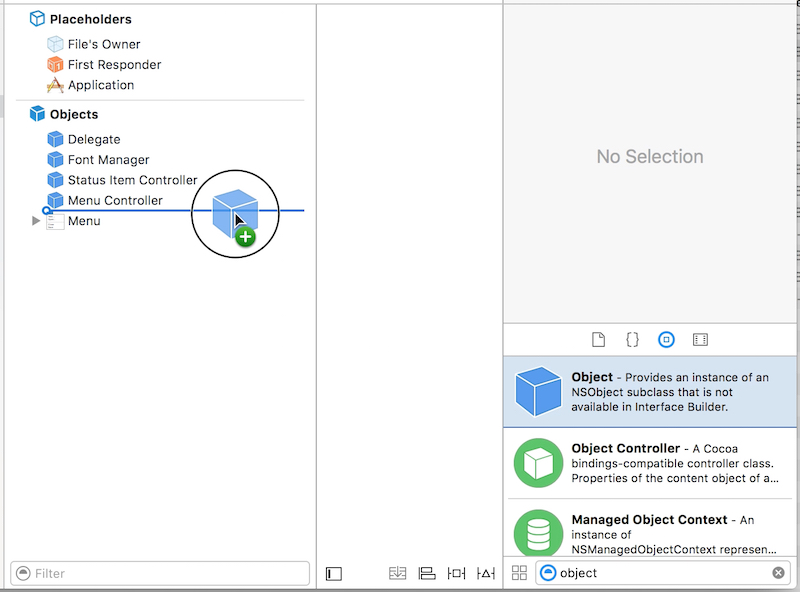
- Add another Object of ‘StatusItemController’.
- Connect Menu object to StatusMenuController’s ‘menu’ outlet.
- Connect StatusMenuController to StatusItemController’s ‘menuController’ outlet.
- Open StatusItemController.swift, init the status bar item in ‘awakeFromNib’.1234567891011class StatusItemController: NSObject {var statusItem: NSStatusItem!weak var menuController: StatusMenuController!override func awakeFromNib() {statusItem = NSStatusBar.systemStatusBar().statusItemWithLength(NSVariableStatusItemLength)statusItem.title = "App"statusItem.highlightMode = truestatusItem.menu = menuController.menu}}
That’s it. Now the app should be able to correctly start. As you can see, the key point is, app will init the ‘MainMenu.xib’ (as defined in Info.plist > ‘Main nib file base name’), then all the objects in ‘MainMenu.xib” will be created. So, the menu and controllers you added in ‘MainMenu.xib” will be created. Clear?
In this case, the AppDelegate could even keep empty. Cool, right?
|
|
How to Show Percent in Status Bar?
There’s class of NSProgressIndicator. The fact of it is a view. Thus the problem becomes how to add this view to status bar.
You will find, the NSStatusItem.view is nil, thus you can’t add to its subview. From the API of NSStatusItem we can found, it’s suggested to use NSStatusItem.button to customize. OK, we can add view to subviews of the button.
|
|
That’s not finished. Using this code could show the percent in status bar, but the size of status bar item is incorrect. How to deal with it? To be honest, I didn’t find a good way, but find a walkaround way, i.e., add an empty image to the status bar item. And then add NSProgressIndicator to the button. It’s not good, but works. The code is as following:
|
|
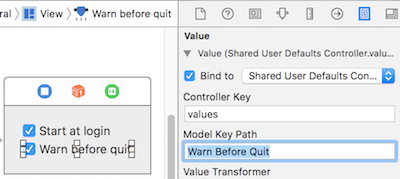
As you can see, NSMenuItem.autoenablesItems is enabled by default. And if it’s enabled, the set of NSMenuItem.enabled property will be ignored. Thus, if you want to manually control the NSMenuItem.enabled property, first disable the NSMenuItem.autoenablesItems property.
How to Support Dark Mode?
There’re 2 key points needed to support dark mode of OS X.
- The icon itself should support. To be exactly, the background of the icon should be transparent.
- Set the
NSMenuItem.image?.template = true
|
|
The normal and dark status bar items look like:


How to Support Indentation Level?
Easy. Just set the NSMenuItem.indentationLevel.

How to Pop Over?
It’s easy to pop over status item. Check the following code:
|
|
But it’s hard to pop over menu item, as menu item’s view is nil by default. And then no view or bound to show popover relatively. Ever see some other app like ClipMenu could implement this feature, but hasn’t found how to do it.
Another walkaround is to use NSMenuItem.toolTip to show additional information of a menu item.
What Left?
- tag and representedObject
- action